Easy Crochet Christmas Tree: Beginner Pattern & Tutorial
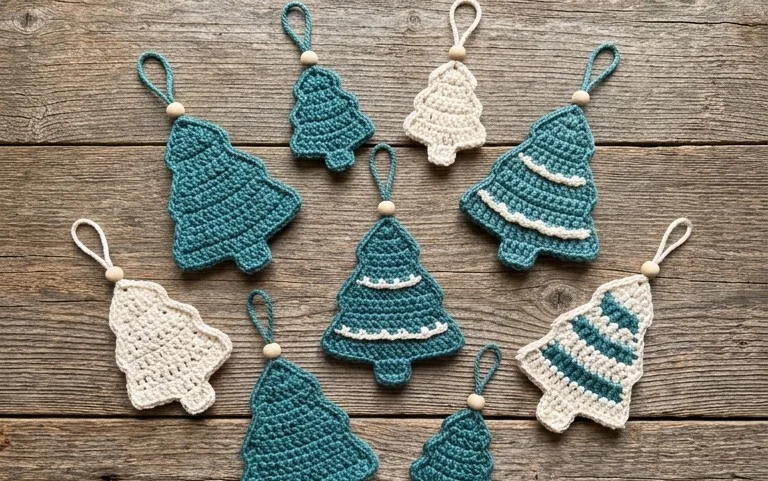
These miniature trees feature a crisp, dense texture that holds its shape on a mantel or shelf throughout the winter season. You create them using basic single crochet stitches, which makes this an accessible project for those just learning the craft or for those who need a quick gift for a friend. The process involves working in a spiral to build a sturdy cone, resulting in a project that feels substantial in your hands. You will gain confidence in managing yarn tension and shaping a three-dimensional form, building skills that serve you well for future home decor projects you might pursue in the coming years.
Why Crocheters Love It
This project is a classic for a reason. It uses simple stitches to create a dense, functional fabric that stands up well to daily use. Beginners find the straightforward construction helpful for mastering tension, while experienced makers appreciate the meditative nature of the repetitive rounds. You can complete this entire piece in a single weekend, making it an excellent choice for a last-minute handmade gift.
I finished this over two evenings while watching television. The instructions are very clear, especially the transition between the base and the sides.
— Sarah, long-time hobbyist
Pattern Overview & Skill Level
- Skill Level: Beginner
- Approximate Time: 4 to 6 hours
- Construction: Working in continuous rounds starting with a flat circular base, then transitioning to upward, un-joined rows for the body.
- Finished Dimensions: 8 inches in diameter and 6 inches in height.
Materials & Supplies Needed
- Yarn: Worsted weight (#4) cotton yarn. Approximately 200 yards in your chosen color. Cotton is preferred for its lack of stretch and durability.
- Hook Size: 5.0 mm / H-8.
- Notions: Tapestry needle for weaving ends, stitch marker to keep track of the start of rounds, and a pair of sharp scissors.
- Yarn Substitutions: Acrylic yarn is a soft alternative, though it will result in a slightly less structured finish than cotton. Avoid bulky or thin yarns, as they will alter the finished size and require a hook size adjustment to maintain proper tension.
Stitch Guide & Abbreviations (US Terms)
- MR: Magic Ring.
- ch: Chain.
- sc: Single crochet.
- inc: Increase (work 2 sc into the same stitch).
- dec: Decrease (sc2tog, inserting hook into the front loops of the next two stitches, yarn over, pull through both, yarn over, pull through remaining two loops).
- sl st: Slip stitch.
- st/sts: Stitch/stitches.
Step-by-Step Pattern Instructions
The Base
- Rnd 1: Work 6 sc into a magic ring (6 sts).
- Rnd 2: Inc in each st around (12 sts).
- Rnd 3: [Inc, 1 sc] repeat 6 times (18 sts).
- Rnd 4: [Inc, 2 sc] repeat 6 times (24 sts).
- Rnd 5: [Inc, 3 sc] repeat 6 times (30 sts).
- Rnd 6: [Inc, 4 sc] repeat 6 times (36 sts).
- Rnd 7: [Inc, 5 sc] repeat 6 times (42 sts).
- Rnd 8: [Inc, 6 sc] repeat 6 times (48 sts).
The Body
- Rnd 9: Working in the back loops only (BLO), sc in each st around (48 sts).
- Rnds 10-25: Sc in each st around (48 sts).
- Rnd 26: [Dec, 6 sc] repeat 6 times (42 sts).
- Rnd 27: [Dec, 5 sc] repeat 6 times (36 sts).
- Finishing: Sl st to the next st to smooth out the edge. Fasten off, leaving a 10-inch tail. Weave the tail through the remaining stitches and pull tight to close if desired, or leave open as a container.
Care & Washing Instructions
- Machine wash your item on a gentle cycle in cold water.
- Reshape the item while it is still damp to ensure it retains its cylindrical form.
- Lay flat on a clean towel away from direct sunlight to dry completely.
Pro Tips & Common Mistakes to Avoid
- Maintain consistent tension throughout the project. If your stitches are too loose, the sides will bow outward, and the item will lose its structural integrity.
- Always place a stitch marker in the first stitch of every round. Since you are working in continuous rounds, it is very easy to lose your place without a marker.
- When weaving in ends, use a tapestry needle to run the yarn through the back loops of the stitches on the inside of the piece. This keeps the exterior looking clean and professional.
- You can adjust the size by stopping the base increases earlier for a smaller diameter or continuing the increases for a wider base. Remember that every extra round of increases requires an additional 6 yards of yarn.
Frequently Asked Questions
Can I use a larger hook for this pattern?
Using a larger hook will result in larger, looser stitches, which makes the fabric floppy rather than stiff. Stick to a 5.0 mm hook to maintain the stability required for the item shape.
Is this project suitable for a complete beginner?
Yes, this project is ideal for beginners. It focuses on the single crochet stitch and teaches you how to work in rounds, which are fundamental skills for many future projects.
How do I know if my tension is correct?
Check your stitches by holding the fabric up to the light. If there are large gaps or holes, your tension is too loose. Try moving down a hook size to tighten the stitch definition.
Can I sell items made from this pattern?
You may sell finished items made from this design, provided you credit the original pattern creator. Always check the specific terms provided by the designer for commercial use policies.
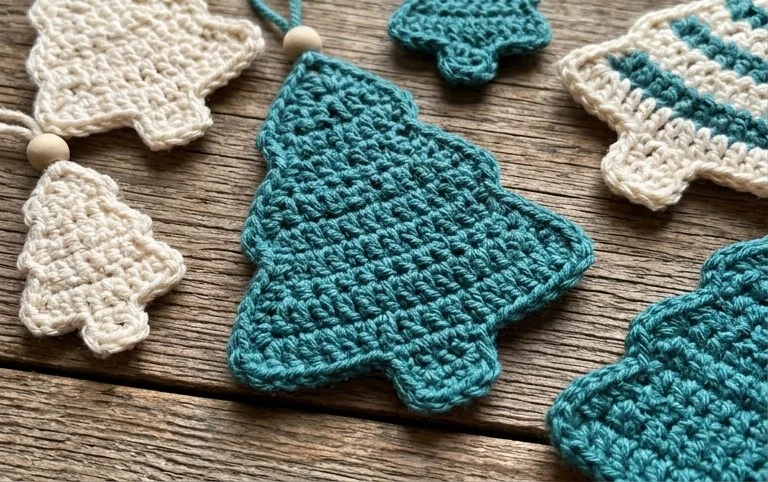
A finished tree brings a touch of handmade warmth to any shelf, especially when you group them in different heights or neutral shades of forest green and cream. You could try using a metallic yarn held together with your cotton to add a bit of shimmer for a festive mantel display. Take a moment to snap a photo of your work and share it on your social feed so others can see your color choices. Come back to the blog soon to browse our library of winter decorations and find your next project.