Small Crochet Witch Hat: Free Beginner Pattern
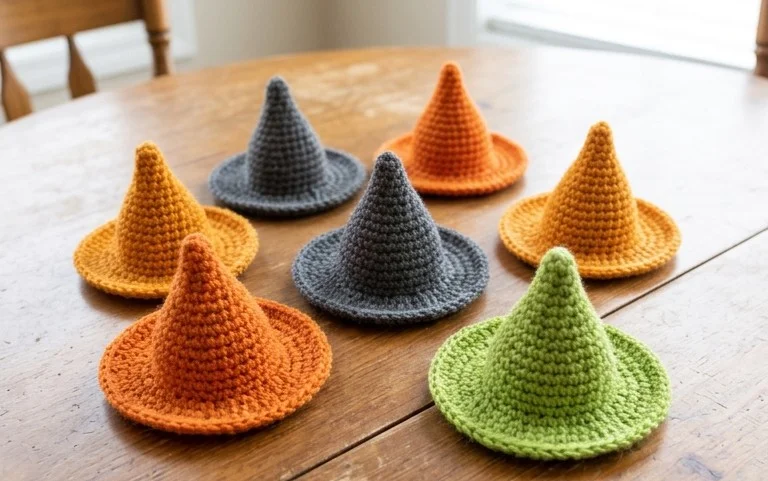
A tiny, pointed brimmed hat brings a bit of handmade charm to your seasonal table or mantle during autumn. This project feels firm in your hand, thanks to the tight tension of the cotton yarn, and it stands upright without any stiffener. Beginners appreciate how quickly the circular base grows into a cone shape, requiring only basic single crochet stitches worked in rounds. You will gain confidence with increasing and decreasing techniques as you build the crown. It is a satisfying way to burn through partial skeins of yarn while creating decor that fits right in the palm of your hand.
Why Crocheters Love It
This beginner-friendly project works up quickly, making it a reliable choice for last-minute gifts or stash-busting yarn scraps. The simple construction relies on basic stitches, ensuring a relaxing rhythm that allows you to crochet while listening to a podcast or watching television. Its small size means you can finish an entire item in a single sitting without feeling overwhelmed. Furthermore, the finished piece provides a functional, durable texture that holds its shape well after repeated use, whether you keep it for your own home or tuck it into a gift bag for a friend.
I managed to finish three of these in one weekend using up leftover yarn from my closet. The instructions are so clear that I did not have to pull out my seam ripper even once.
— Sarah, hobbyist crocheter
Pattern Overview & Skill Level
- Skill Level: Beginner
- Approximate Time: 1 to 2 hours
- Construction: Worked in continuous rounds from the center outward
- Finished Dimensions: 6 inches in diameter
Materials & Supplies Needed
- Yarn: Worsted #4 weight, cotton fiber recommended for durability, approximately 50 yards per piece.
- Hook Size: 5.0 mm / H-8
- Notions: Tapestry needle for weaving ends, stitch marker to track the start of rounds, scissors.
- Yarn Substitutions: Acrylic yarn is a soft alternative, though it lacks the heat resistance of cotton if used as a coaster or dishcloth. Choosing a thicker yarn will increase the finished diameter, while a thinner yarn will result in a smaller final product.
Stitch Guide & Abbreviations (US Terms)
- ch = chain
- sc = single crochet
- inc = increase (work 2 sc in the same stitch)
- sl st = slip stitch
- st/sts = stitch/stitches
- MR = magic ring
- Rnd = round
Step-by-Step Pattern Instructions
This project is worked in continuous rounds. Place your stitch marker in the first stitch of every round to keep track of your position.
Main Body
- Rnd 1: Start with a MR, work 6 sc into the ring. (6 sts)
- Rnd 2: Work 2 sc in each st around. (12 sts)
- Rnd 3: 1 sc, inc repeat from * to * 6 times. (18 sts)
- Rnd 4: 2 sc, inc repeat from * to * 6 times. (24 sts)
- Rnd 5: 3 sc, inc repeat from * to * 6 times. (30 sts)
- Rnd 6: 4 sc, inc repeat from * to * 6 times. (36 sts)
- Rnd 7: 5 sc, inc repeat from * to * 6 times. (42 sts)
- Rnd 8: 6 sc, inc repeat from * to * 6 times. (48 sts)
Finishing
After completing Round 8, work one final sl st into the next stitch to level off the edge. Cut your yarn, leaving a 6-inch tail for weaving. Pull the tail through the final loop and use your tapestry needle to sew the end into the back of the work. Trim any excess fiber close to the fabric to ensure a neat, professional appearance.
Care & Washing Instructions
- Machine wash in cool water on a gentle cycle to preserve the fiber structure.
- Lay the piece flat on a clean towel to air dry, reshaping it with your hands while damp.
- Avoid using bleach or high-heat drying, which can cause the yarn to lose its color or shrink unevenly.
Pro Tips & Common Mistakes to Avoid
Maintain consistent tension by holding your yarn with a steady grip throughout the process, which prevents gaps between stitches. Always move your stitch marker up to the first stitch of the new round immediately after completing the last stitch of the previous round to avoid losing your count. Weave your yarn ends into the stitches in the opposite direction of the yarn’s path to lock them securely in place. If you wish to make this project larger, continue adding increase rounds—7 sc, inc for the next round, 8 sc, inc for the following, and so on—keeping in mind that you will need additional yardage for each extra round.
Frequently Asked Questions
Can I use a different yarn weight for this pattern?
Yes, you can use a different yarn weight. Using a thinner yarn will result in a smaller diameter, while a thicker yarn will create a larger, denser piece. You may need to adjust your hook size to match the yarn weight recommended on the label.
Why does my circle look wavy or rippled?
A wavy edge typically indicates that there are too many stitches in the round, causing the fabric to ruffle. Ensure you are following the increase counts exactly and check that your tension is not too loose.
How do I know if I have enough yarn to finish?
This pattern requires approximately 50 yards. If your skein feels light, weigh it on a kitchen scale before starting. If you have less than 20 grams of worsted weight yarn, you may run out before finishing the final round.
Am I allowed to sell the items I make with this pattern?
Yes, you are welcome to sell finished products made from this design. Please credit the pattern origin in your shop listings to help others find the source.
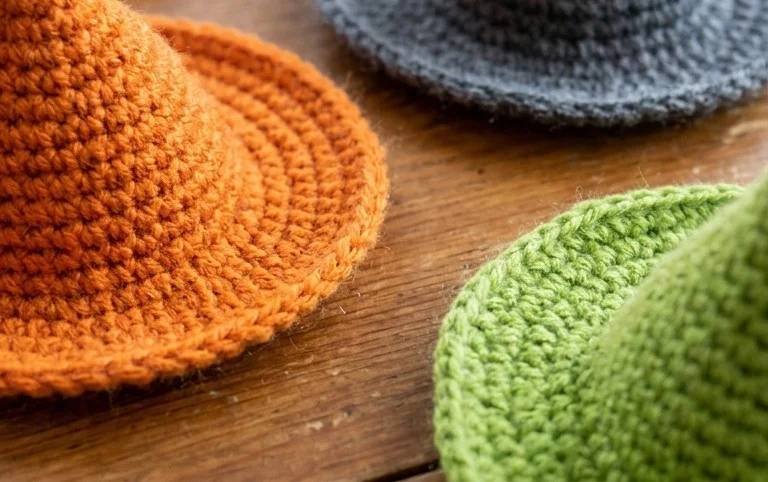
Your finished miniature hat brings a playful touch of magic to any shelf or holiday centerpiece. You can change the vibe entirely by using a variegated yarn for a whimsical look or by adding a tiny silk flower to the brim for a bit of contrast. Snap a photo of your work and share it with the crafting community online. If you enjoyed this quick project, browse the rest of my site for more free patterns to fill your afternoon hours with creative stitches.